Installing a water line for your ice maker is a straightforward DIY project that ensures a steady supply of fresh ice. This process typically involves seven essential steps, starting with gathering tools and materials like a saddle valve, tubing, and a shut-off valve, and concluding with restoring the water supply and checking for leaks. Properly connecting your ice maker to a water source can be completed in approximately 1-2 hours with basic plumbing knowledge.
Gather Your Tools and Materials
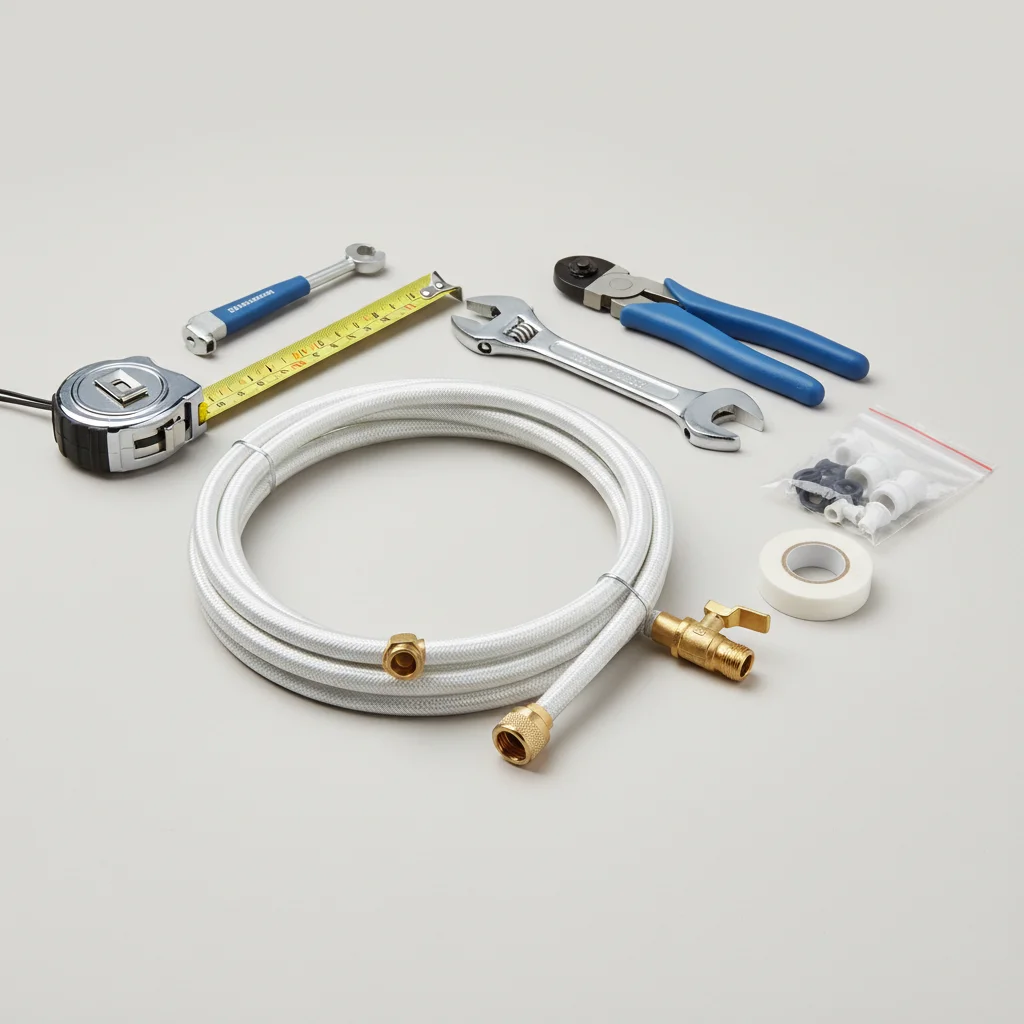
Before you begin, ensure you have all the necessary components. You’ll typically need a saddle valve or a T-fitting, copper or braided stainless steel tubing, a shut-off valve, a drill, a wrench, a tube cutter, and a bucket. Confirm the diameter of your ice maker’s water inlet to choose the correct tubing size, which is usually 1/4 inch. Having everything ready beforehand will streamline the installation process. For ice maker buying guides on this site.
Locate and Prepare the Water Source
The most common water source for an ice maker is a cold water line under your kitchen sink. Identify a cold water pipe that is easily accessible and free from obstructions. Turn off the main water supply to your house before making any connections to prevent leaks and water damage. Once the water is off, open a nearby faucet to drain any remaining water from the pipes.
Install the Saddle Valve or T-Fitting
For a saddle valve, position it on the cold water pipe and tighten the clamps securely. The valve will pierce the pipe to create a connection. If using a T-fitting, you’ll need to cut a section of the cold water pipe and insert the T-fitting, sealing it with compression fittings or solder. A T-fitting provides a more robust and leak-resistant connection compared to a saddle valve, though it requires more effort to install.
Run the Water Line to the Ice Maker
|
Our Picks for the Best Ice Maker in 2026
As an Amazon Associate I earn from qualifying purchases.
|
||
| Num | Product | Action |
|---|---|---|
| 1 | Silonn Nugget Ice Maker Countertop, Pebble Ice Maker with Soft Chewable Ice, One-Click Operation Ice Machine with Self-Cleaning, 33lbs/24H for Home,Kitchen,Office |

|
| 2 | Efficient Countertop Ice Maker |
|
| 3 | Silonn Ice Maker Countertop, Portable Ice Machine with Carry Handle, Self-Cleaning Ice Makers with Basket and Scoop, 9 Cubes in 6 Mins, 26 lbs per Day, Ideal for Home, Kitchen, Camping, RV |
|
| 4 | FRIGIDAIRE Touchscreen Nugget Ice Maker, Countertop Ice Machine, Sonic Ice Maker with 33 lbs. Capacity, Slate |
|
| 5 | Typhur Fast Nugget Ice Maker Countertop with Self-Cleaning Pump, 35lbs/24H Crushed Pebble Ice Machine with Pellet Ice, 8 Packs Cleaner, Dual Ice Scoops for Home, Kitchen, Party, RV, Stainless Steel |
|
| 6 | EUHOMY Countertop Ice Maker Machine with Handle, 26lbs in 24Hrs, 9 Ice Cubes Ready in 6 Mins, Auto-Cleaning Portable Ice Maker with Basket and Scoop, for Home/Kitchen/Camping/RV. (Black) |
|
| 7 | Nugget Ice Maker Countertop, Silonn Chewable Pellet Ice Machine with Self-Cleanin Function, 33lbs/24H Portable Ice Makers for Home Kitchen Officce, Black |
|
| 8 | ETL Approval Clear Ice Cube Maker Countertop, 3 Crystal 1.6" Clear Ice Cube in 10-20Mins, Slow-Melting & Adjustable Ice Thickness, Ice Makers Countertop with Self-Cleaning for Kitchens/Home/Office |
|
| 9 | Frigidaire Countertop Crunchy Chewable Nugget Ice Maker, Compact, 33lbs per Day, Metallic Finish |
|
| 10 | Frigidaire 26 Lbs per Day Portable Compact Maker, Ice Making Machine, Stainless, Medium |
|
Carefully unroll your copper or braided stainless steel tubing and route it from the saddle valve or T-fitting to the back of your refrigerator or ice maker. Avoid kinks in the tubing, as these can restrict water flow. Secure the tubing along its path using pipe clamps or zip ties to prevent it from being accidentally pulled or damaged. Leave a little slack at both ends for easier connection.
Connect the Water Line to the Ice Maker
At the back of your refrigerator, locate the water inlet valve. Connect the end of your water line to this valve, typically using a compression fitting. Ensure the connection is snug but do not overtighten, as this can damage the fitting. Use a wrench to tighten the nut, then give it a gentle tug to confirm it’s secure.
Restore Water Supply and Check for Leaks
Once all connections are made, slowly turn the main water supply back on. Check all connections for any signs of leaks. A small drip can quickly become a major problem, so inspect thoroughly. If you find a leak, tighten the connection slightly. If the leak persists, you may need to re-do the connection. Allow the ice maker to cycle and produce its first batch of ice, then check for leaks again.
Final Checks and Maintenance Tips
- Ensure the ice maker is level for proper operation.
- Discard the first few batches of ice to flush out any impurities from the new line.
- Regularly check the water line for kinks or damage.
- Consider installing an inline water filter for better-tasting ice and to protect your ice maker from sediment.
- Periodically inspect the connections for any signs of corrosion or loosening.
Frequently Asked Questions
What tools are needed to install an ice maker water line?
To install an ice maker water line, you will typically need a saddle valve or T-fitting, copper or braided stainless steel tubing (usually 1/4 inch), a shut-off valve, a drill, a wrench, a tube cutter, and a bucket. Having these tools ready ensures a smooth installation process.
Where is the best water source for an ice maker?
The best water source for an ice maker is generally a cold water line located under your kitchen sink. This location is usually easily accessible and provides a reliable supply of cold water for ice production. Always turn off the main water supply before making any connections.
Should I use a saddle valve or a T-fitting for my ice maker?
A T-fitting provides a more robust and leak-resistant connection for your ice maker's water line compared to a saddle valve. While a saddle valve is easier to install by piercing the pipe, a T-fitting requires cutting a section of the pipe but offers greater long-term reliability.
How do I check for leaks after installing an ice maker water line?
After installing an ice maker water line, slowly turn the main water supply back on and thoroughly inspect all connections for any signs of leaks or drips. If a leak is found, tighten the connection slightly. Allow the ice maker to cycle and produce its first batch of ice, then re-check for leaks.
What maintenance is required for an ice maker water line?
Regular maintenance for an ice maker water line includes ensuring the ice maker is level, discarding the first few batches of ice after installation, and periodically checking the line for kinks or damage. Consider installing an inline water filter for improved ice quality and to protect the ice maker from sediment.
Install an Ice Maker Water Line
This guide provides a step-by-step procedure for installing a water line to your ice maker, ensuring a steady supply of fresh ice.
Collect all necessary items, including a saddle valve or T-fitting, 1/4-inch tubing, a shut-off valve, drill, wrench, and tube cutter. Confirm the tubing size matches your ice maker's inlet.
Identify an accessible cold water line under your kitchen sink. Turn off the main water supply to your house and drain any remaining water from the pipes by opening a nearby faucet.
Attach the saddle valve to the cold water pipe and tighten securely, or cut the pipe to insert a T-fitting, sealing it with compression fittings. A T-fitting offers a more secure connection.
Carefully route the copper or braided stainless steel tubing from the valve/fitting to the back of your refrigerator. Avoid kinks and secure the tubing with clamps, leaving some slack at both ends.
Connect the water line to the ice maker's inlet valve using a compression fitting, ensuring it's snug but not overtightened. Slowly restore the main water supply and thoroughly check all connections for any leaks.
Get our weekly buyer guide
Practical specs, not advice. Unsubscribe anytime.
Fantastic guide! I’ve been wanting to connect my ice maker for ages but was intimidated by the process. The instructions on checking for leaks at the end were particularly useful and gave me peace of mind. It was a surprisingly easy DIY project, and I’m so glad I finally did it. No more buying bags of ice!
I was really nervous about installing a water line myself, but this guide made it super clear. The tip about using a shut-off valve was a lifesaver, especially since I’m not a plumbing expert. It took me about an hour and a half, just like it said, and now I have perfect ice without refilling trays. Highly recommend following these steps!
I followed the seven steps for installing the water line, and while it mostly worked, I had a bit of trouble with the T-fitting. It wasn’t as straightforward as I hoped, and I ended up with a small leak that took some extra tightening to fix. The ice maker is running now, but it definitely took me longer than the 1-2 hours mentioned.
This was mostly very helpful for getting my new ice maker hooked up. I appreciated the detailed list of tools and materials, especially knowing to check for the 1/4 inch tubing size. My only minor issue was that my old pipes were a bit stubborn, so the saddle valve took a little more effort than I expected. Still, it’s working great now!